
In Rhino3D and Grasshopper, colorize a mesh surface dependant on its slope angle. Inspired by Luis Fraguarda’s O’Reilly Course, but the final solution I chose is by David Rutten.
New to Grasshopper? I suggest you read this article in the first place.
Need more learning resources? Check this out.
You can find the O’Reilly online course here. I highly recommend watching it: Lots of useful information, fast, intense. And David Rutten’s explanation can be found here in the Grasshopper forum.
I also advise you to work through some literature like: Arturo Tedeschi, AAD Algorithms-Aided Design: Parametric Strategies using Grasshopper.
Let’s start. The idea is to produce a terrain-like surface and assign colors that refer to the surface’s slope. This works best with a mesh which we’ll derive from a NURBS surface.
Start in Rhino3D: NURBS Surface


This surface is meant to be transformed into a mesh, so let’s add some subdivision via Rebuild:


To distort our plain surface switch on control point display:

Then select small groups of control points and move them up or down to create a “terrain”.

New to Grasshopper? I suggest you read this article in the first place.
Need more learning resources? Check this out.
Grasshopper: NURBS to Mesh
Pick a Surface input parameter …

… and load your Rhino3D surface:

To keep NURBS and mesh surface apart, produce and offset a copy of the surface via Move:

Choose a distance that makes sense, in my case it’s 20 units:

Tu turn the copied surface into a mesh, pick the Mesh Surface component:

Connect the moved surface’s Geometry output to the Mesh Surface input. This component allows for a customized UV subdivision. Set appropriate values, in my example it’s 50 for both U and V:

Switch off all previews but for the NURBS and mesh surface. Here you are:

New to Grasshopper? I suggest you read this article in the first place.
Need more learning resources? Check this out.
Colorize your Mesh
To colorize the mesh slopes we need access to the corresponding mesh parameters, e.g. the mesh normals. We get these via a Deconstruct Mesh component:

As you can see, this component produces a list of vector coordinates (N) which define the directions of the mesh normals:

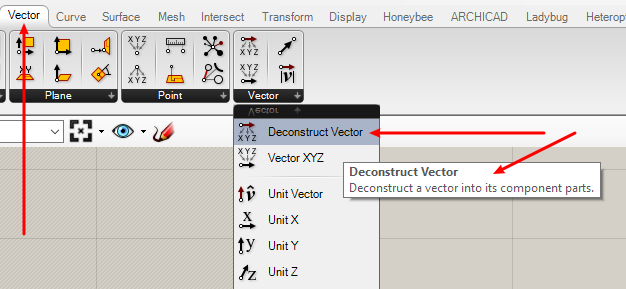
And of course, the higher the Z-value, the steeper the normal. And vice versa: The lower the Z-value, the steeper the slope. So it makes sense to use these Z-values for the coloring. How to extract them? Pick a Deconstruct Vector component and connect it to the N output:

Just for a better understanding what’s going on, I used a Bounds and Deconstruct Domain component to display the Z min and max values. In my example, the lowest Z-value is 0.20327 which defines the steepest slope in my terrain. The highest Z-value is 1, meaning here my terrain is absolutely horizontal.

As I said, this last step’s purpose was only to display the Z-value domain in this mesh. Now let’s move on with colorizing. A Gradient component can be used for our purpose:

Choose a preset with more than one colour, but not too many:

Then, to assign the gradient to the mesh, we need a Mesh Colours component:

Connect the Gradient’s t input to the Deconstruct Vector Z output. Now each Z value will have a gradient colour assigned dependant on its position on the range between our min and max Z-values as shown above.
Connect the Mesh Surface output to the according Mesh Colours input. To make things complete, connect the Gradient’s output to Mesh Colours’ C input.

Already you see that it works:

It may be necessary to tune the gradient to get a more explicit colouring:


That’s fine. Now, as we still have a live connection between NURBS and mesh, feel free to recreate your NURBS surface and observe the change of mesh colours:


That’s it.
New to Grasshopper? I suggest you read this article in the first place.
Need more learning resources? Check this out.
Grasshopper-ARCHICAD-connection: See here for more information.
© 2019 / Horst Sondermann / All Rights reserved

Leave a Reply
You must be logged in to post a comment.